Easy Wall Decoration Ideas You'll Actually Finish This Weekend
No skills, no stress, no abandoned half-projects. Climb the Effort Ladder: 15-minute wins at the bottom, one-hour upgrades in the middle, and one glorious Sunday project at the top.
 By Malik Ashraf · 12 min read
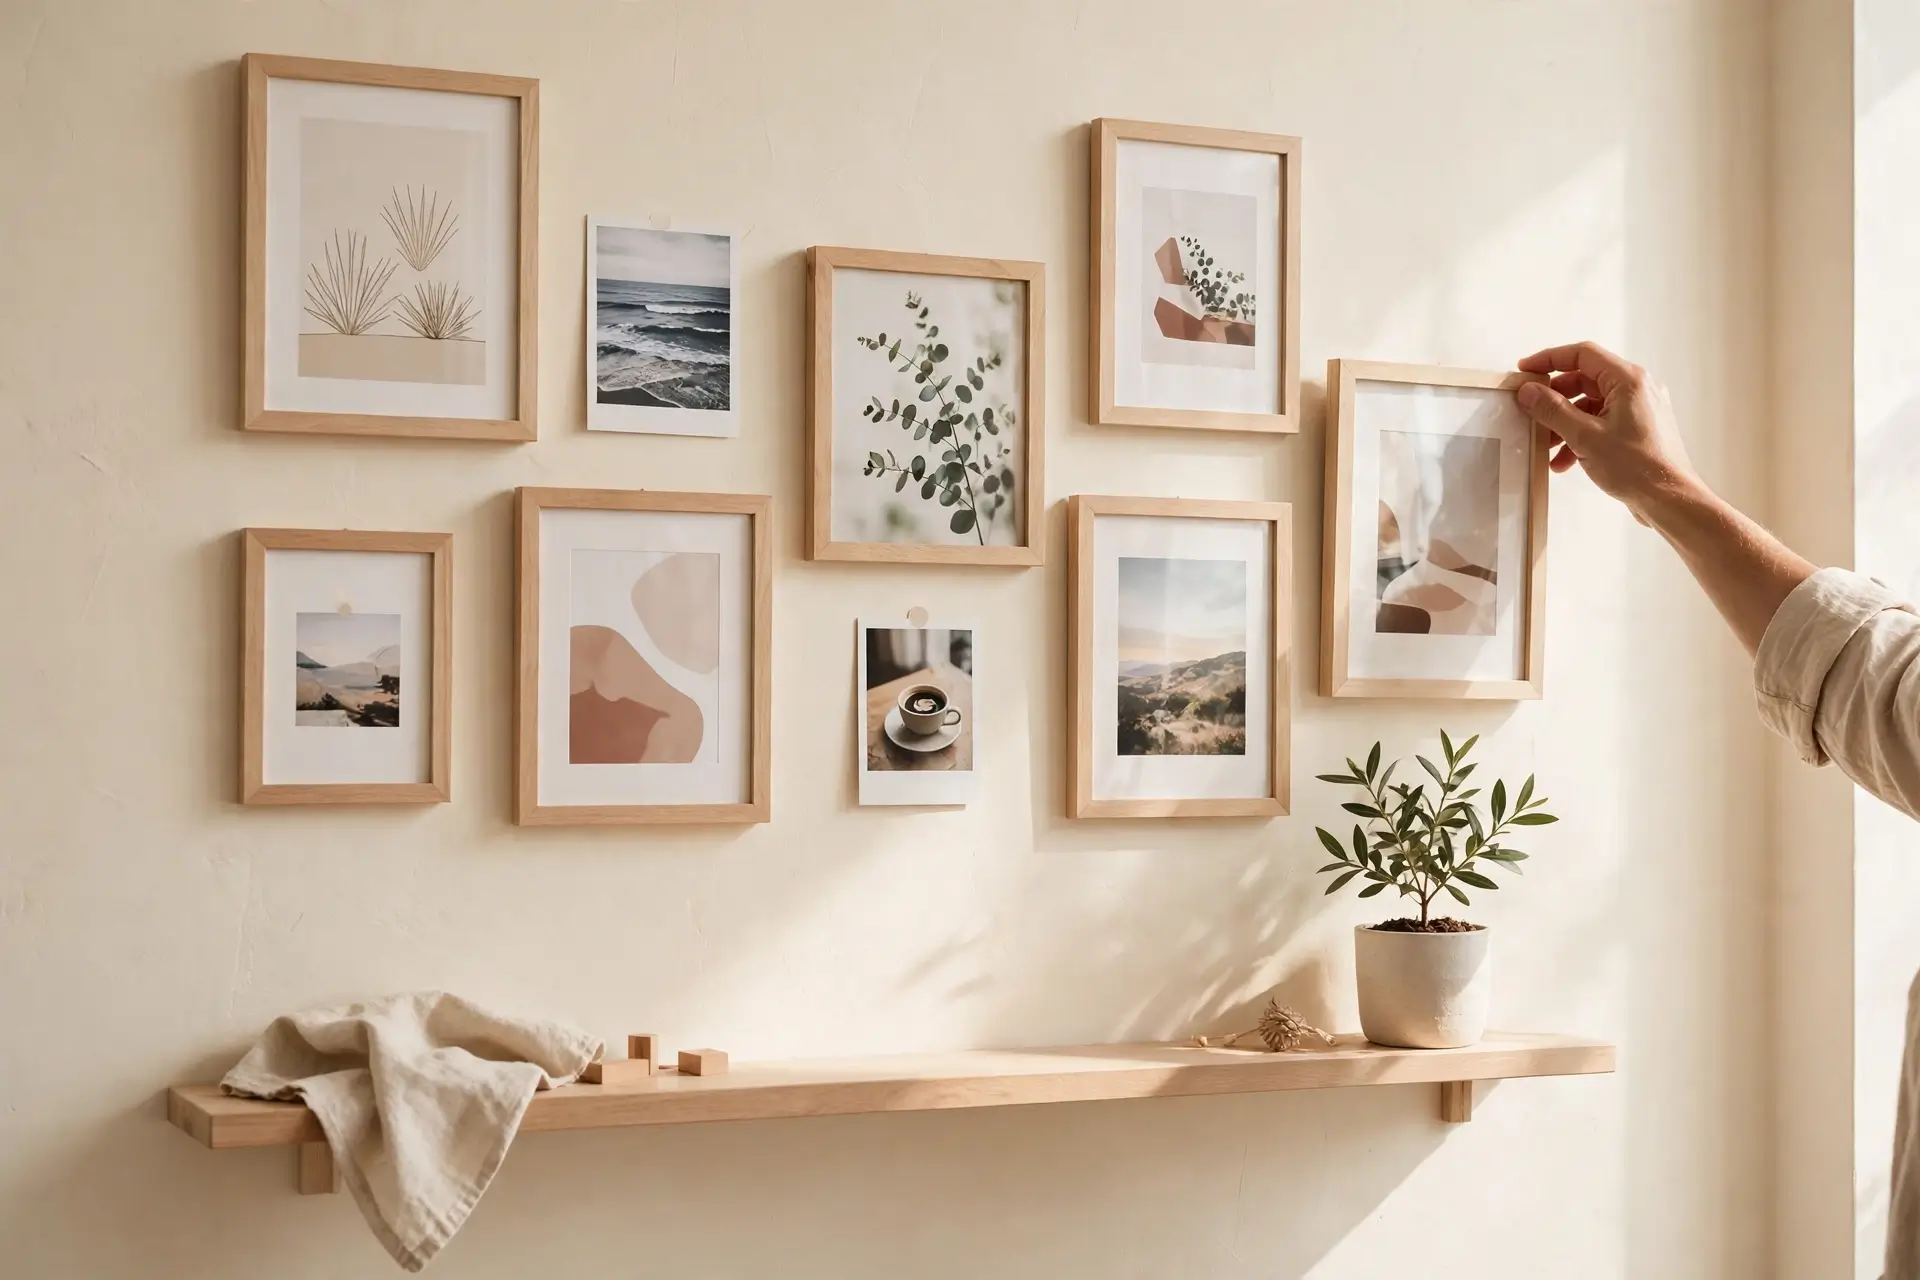 ⏱ STARTS AT 15 MINUTES
Most "easy" wall decor lists lie to you. They say easy and mean easy for someone who owns a miter saw. This guide means something stricter: every idea below can be finished in the time stated, by someone who has never decorated a wall before.
The ladder has three rungs. Start at the bottom — even Level 1 alone can transform a room — and climb only as far as your weekend allows. Ideas marked no-drill need zero holes, so renters can climb the whole ladder too. For style direction to pair with these projects, browse the wall ideas collection and our living room ideas.
Level 1 — Instant Wins
No tools. No planning. Just do one and feel the difference.Lean, don't hang NO-DRILL
Take one large frame and lean it on the dresser, console, or mantel against the wall. Leaning art looks intentional, takes ten seconds, and moves whenever you want.
How: literally lean it. Slight tilt back, bottom edge an inch from the wall.
Swap the prints, keep the frames NO-DRILL
New art without new holes: print fresh images at home or a print shop and slide them into frames you already own. The wall changes; the nails stay.
How: measure your frame's insert size, print to fit, swap in five minutes per frame.
Twine + clothespins photo line NO-DRILL
Stretch twine between two adhesive hooks and clip photos with mini clothespins. Dorm-room classic, grown-up approved — and you can swap photos with the seasons.
How: two hooks, one length of twine, a dozen prints. Done before the kettle boils.
Move the mirror NO-DRILL
Relocate your existing mirror to where it catches a window. You already own the decor — you're just giving it a better job. Free, instant, dramatic.
How: stand it where it reflects sky or greenery, not clutter.
Washi-tape frames NO-DRILL
Outline "frames" directly on the wall with patterned washi tape and stick a print inside each. Removable, repositionable, and weirdly chic.
How: tape rectangles, press prints inside with more tape. Peel off clean whenever.
Wall-mounted bud vase NO-DRILL
One small wall vase on an adhesive hook with a single stem — eucalyptus, a dried flower, a cutting from a houseplant. Living decor that costs nothing and changes with the seasons.
How: adhesive hook at eye level, hang a test-tube vase or small bottle with twine. Refresh the stem weekly.
Frame the everyday NO-DRILL
Kids' drawings, a beautiful postcard, a page torn from a calendar, wrapping paper you couldn't throw away — slip them into simple frames. Personal beats purchased, every time.
How: one standard frame size repeated three times turns random papers into a deliberate collection.
Level 2 — Real Upgrades
Basic tools: hammer, level, tape measure. One focused hour.The paper-template gallery wall
The reason gallery walls go wrong is guessing. Trace each frame on paper, tape the papers to the wall, live with it for ten minutes, then hammer through the paper. Zero regret holes.
How: kraft paper, painter's tape, pencil marks for nails. The template is the project; hanging takes minutes.
One floating shelf
A single shelf above a console or desk adds display space and a horizontal line that organizes the whole wall. Style it with three objects and stop.
How: find one stud (or use proper drywall anchors), level, two brackets, done.
Plate or basket wall NO-DRILL
Decorative plates or flat woven baskets on adhesive plate hangers make a warm, textural display — especially lovely in dining areas and kitchens.
How: adhesive disc hangers on the back of each piece, arrange on the floor first, then stick.
Peel-and-stick wallpaper panel
You don't need a whole wall — one framed-style panel (a neat rectangle behind the bed or sofa) gives the wallpaper look with a fraction of the commitment.
How: measure, cut, peel, smooth from the center out. A helper makes it twice as easy.
Dip-painted frames
Take mismatched thrift frames and paint just the bottom third in one accent color. Suddenly they're a set — the oldest stylist trick for unifying chaos.
How: painter's tape line, one small paint sample pot, quick-dry. Hang when dry.
LED strip behind the shelf NO-DRILL
A peel-and-stick LED strip along the back edge of your floating shelf washes the wall in warm light. The shelf you hung an hour ago suddenly looks like a design feature.
How: stick the strip to the shelf's rear underside, run the cable discreetly down the wall's edge. Warm white, always.
Chalkboard memo panel
One framed chalkboard (or a chalkboard-painted panel) by the desk or in the kitchen — part decor, part command center. Doodles and grocery lists have never looked this intentional.
How: chalkboard paint on a cut-to-size board, or buy a ready-made framed board and hang it like art.
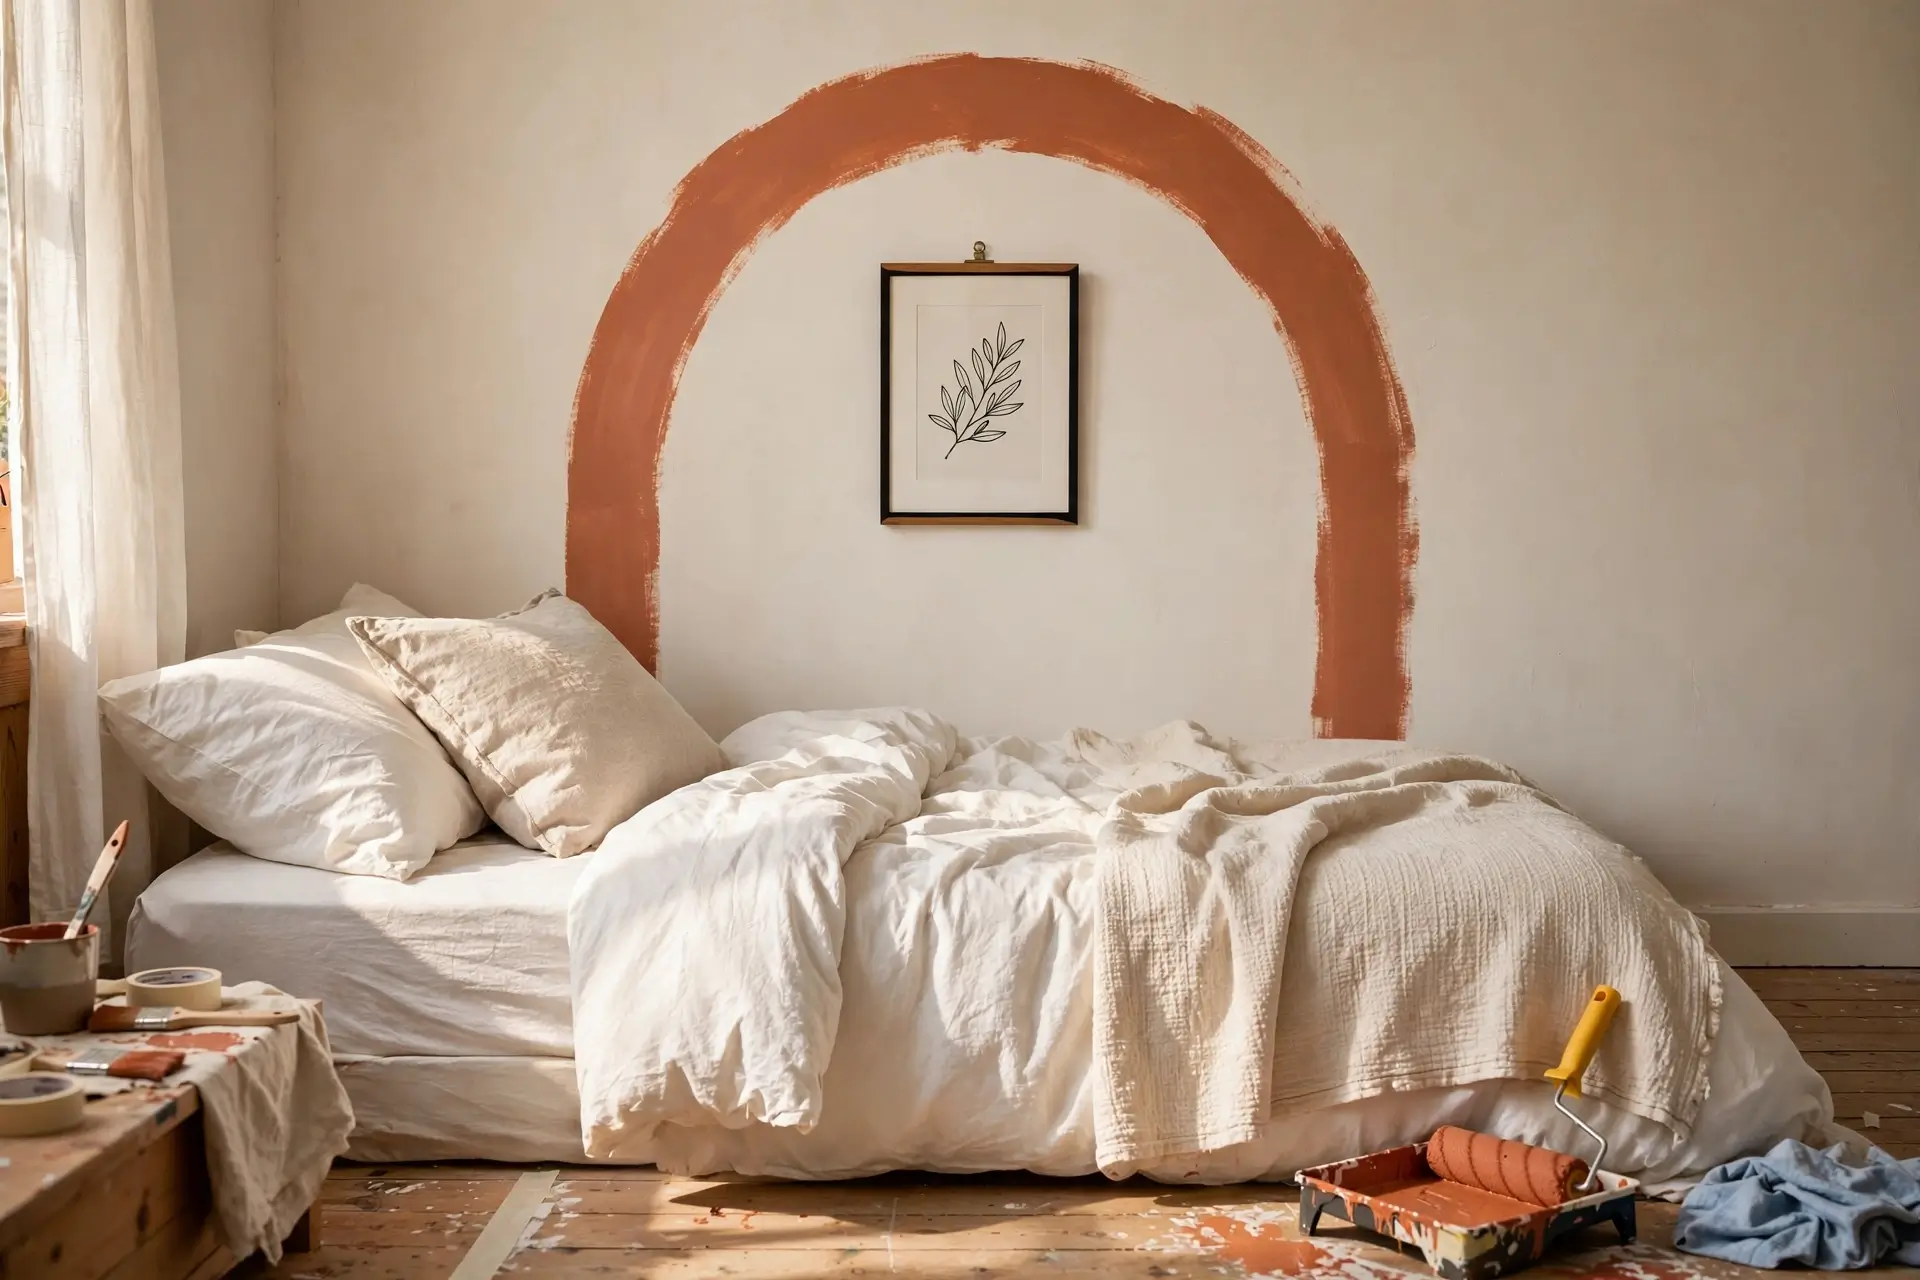
Level 3 in progress: a painted arch — one sample pot, one afternoon, zero experience required.
Level 3 — The Showpiece
One afternoon, one wall, one story to tell. Pick exactly one.The painted arch
A single arch in a warm tone behind the bed or sofa — the highest impact-per-effort project in wall decor. One sample pot, painter's tape, a steady hand.
How: mark the arch with a pencil tied to string (compass-style), tape the edge, two coats, peel tape while the second coat is tacky.
Limewash accent wall
Limewash paint goes on with random crisscross strokes — and the randomness is the finish, so beginners genuinely can't mess it up. Cloudy, soft, expensive-looking.
How: one wall, a big brush, X-shaped strokes. Two coats, letting the first dry fully.
Peel-and-stick board & batten NO-DRILL
Thin adhesive trim strips in a grid pattern give you the panel-molding look with zero sawing. Paint them wall-color for subtle architecture.
How: plan the grid on paper, stick strips level, caulk-free — the adhesive does the work.
Fabric-wrapped canvases NO-DRILL
Stretch bold fabric over cheap canvas frames and staple at the back — instant large-scale art for the price of fabric. Change the fabric whenever your taste changes.
How: lay fabric face-down, center the canvas, pull tight and staple. Three panels in a row = a triptych.
Two-tone color blocking
Paint the lower third (or half) of one wall in a deeper tone with a crisp taped line. It grounds furniture, hides scuffs near the floor, and looks far more designed than one flat color.
How: tape a level line at your chosen height, paint below it, peel tape while tacky. One wall only — restraint is the design.
🧰 The 5-Tool Kit (all you'll ever need for this guide)
- Hammer — for the few nails Level 2 actually needs
- Tape measure — measure twice, hang once is real advice
- Small level — or the level app on your phone in a pinch
- Painter's tape — for templates, arch edges, and holding ideas up temporarily
- Adhesive hooks & strips — the renter's entire hardware store in one drawer
The $0 Refresh: Shop Your Own Home First
Before spending anything, walk through your home with fresh eyes and a laundry basket. That print gathering dust in the hallway? It might be perfect above the desk. The mirror in the dim corner? It belongs opposite the bright window. The frames in the closet from two apartments ago? Dip-paint them and they're new.
Designers call this "shopping the house," and it's the fastest free upgrade there is — because the pieces already survived your taste test once. Move three things to new walls, live with them for a week, and only then decide what (if anything) you still need to buy. Most "blank wall problems" are actually "right piece, wrong wall" problems.
Five Easy-Project Mistakes
Hanging first, measuring never
Eyeballing heights is how walls end up with art at forehead level and a constellation of extra holes. Fix: the tape measure is in the kit for a reason — mark with painter's tape before any nail.
Starting three projects at once
Enthusiasm opens five tabs; Sunday ends with five half-done walls. Fix: finish one level completely before starting the next. Done beats ambitious.
Skipping the stud check for heavy pieces
Big mirrors on drywall anchors alone are a slow-motion accident. Fix: anything heavy goes into a stud — a cheap stud finder pays for itself the first use.
Buying before planning
The cart is full but nothing fits the actual wall. Fix: photograph and measure the wall first, then shop with numbers in hand.
Copying a photo exactly
Your wall isn't their wall — same frames, different proportions, disappointing result. Fix: steal the idea (the arch, the shelf), then adapt sizes to your measurements.
The Friday Night Plan
Weekends fail from lack of planning, not lack of talent. Friday night, 20 minutes:
- Pick your level — honestly. Tired week? Level 1. Restless energy? Level 3.
- Pick ONE wall — photograph it, measure it, write the numbers on your phone.
- Gather everything — tools, prints, tape. A Saturday project that needs a store run is a Sunday project.
- Sleep on the plan — Saturday morning you'll either still love it (proceed) or have a better idea (even better).
Easy Wall Decor FAQs
What is the easiest wall decoration for beginners?
Leaning art against the wall on existing furniture — zero tools, zero holes, zero risk. Second place: swapping new prints into frames you already own. Both change a room in minutes and teach you what you like before you commit to nails.
How can I decorate walls without drilling any holes?
Adhesive picture-hanging strips for light frames, adhesive hooks for textiles and twine lines, leaning large pieces on furniture, peel-and-stick wallpaper or trim, and washi-tape designs. Check weight ratings on adhesives and remove them slowly with gentle heat for clean removal.
What is the cheapest way to decorate a blank wall?
Rearrange what you own first (free), then print your own photos at a local print shop — large prints cost little and fill big walls. Fabric from a craft store stretched over a cheap canvas is the best large-scale art per money spent. Thrift frames plus dip-painting unify mismatches beautifully.
How high should I hang wall art?
A widely used starting point is centering artwork at eye level — roughly 145–150 cm (about 57–60 inches) from the floor to the center of the piece. Above furniture, leave a hand's-width gap so art and furniture read as one group. When in doubt, hang it lower than your instinct says — most beginners hang too high.
What if I mess up a DIY wall project?
Almost everything here is forgiving: paint covers paint, adhesive strips peel off, paper templates prevent wrong holes, and small nail holes fill with a dab of putty. Start with the most reversible level (Level 1) to build confidence — skill is just finished projects stacked up.
How do I make cheap wall art look expensive?
Three moves: consistent framing (same frame color unifies anything), generous matting (white space reads as gallery), and good lighting (a picture light elevates a ten-dollar print). Expensive-looking walls are 20% art, 80% presentation.
Keep exploring: every project style here appears in the wall ideas collection, and our bedroom ideas page shows easy wins in full-room context. Start from the Roomiora homepage if you're new here.
Small room? Pair these projects with the small bedroom ideas guide for maximum impact per effort.
Malik Ashraf
Founder & Editor, Roomiora. Home-design enthusiast sharing real-life room ideas — tested layouts, honest costs, no showroom fantasies.
More about Malik →